
You send an audio on WhatsApp and the person on the other end tells you that he or she hears you strangely, as if you were talking from a tunnel. Or you make a call and your caller complains that your voice sounds muffled. Before thinking about a breakdown or going through technical service, there is a much more probable cause with a simple solution: the microphone is dirty.
Dust, pocket lint and dirt accumulated from daily use are the main enemies of such a small and critical component. And the good thing is that cleaning the mobile microphone is within reach. anyone if done with head.
First, locate where the microphones are
Here comes something that many people don't know: your cell phone doesn't have a single microphone, but two or threeand in the high-end ones even four. Each one fulfills a different function.
The main one is on the bottom of the phone, right next to the USB charging port. It is the one used in the everyday calls and when recording voice memos. There is a second microphone on the upper edge of the device, whose mission is noise cancellation: it works in parallel with the lower one to filter ambient sound and that your voice reaches the receiver more clearly. And the most advanced models incorporate a third – or fourth – in the area of the rear cameras, aimed at improving the audio in video recordings and allowing functions such as audio zoom.
This means that if you clean only the hole you know of and another one is clogged, the problem may not completely go away. They are all worth checking out..
What do you need to do it well?
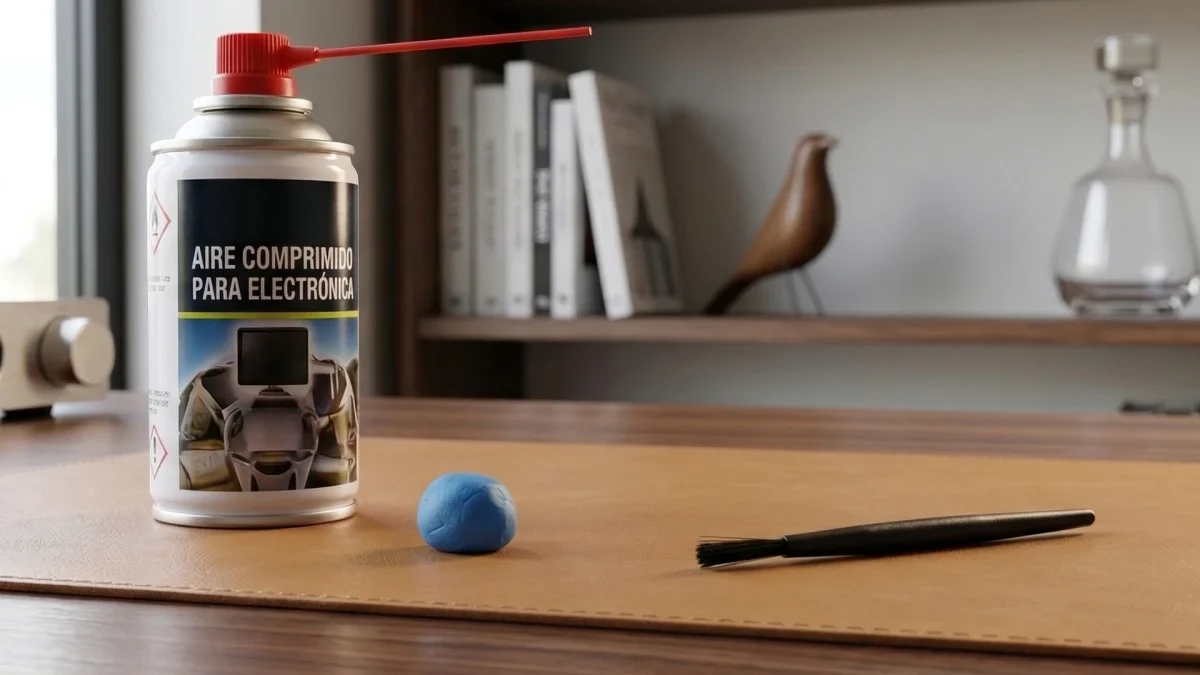
You don't need any exotic tools. With three basic utensils you have more than enough:
- Compressed air for electronics: cans specifically for electronic devices are the safest option. Be careful, not just anyone will do; some have too much pressure and can damage internal components. Make sure the packaging says it is suitable for electronics.
- A fine tip brush: Smartphone cleaning kits include one with bristles less than 0.7 mm in diameter, which is what you need to easily enter the microphone hole without damaging anything. You find them on Amazon or AliExpress for very little money.
- Cleaning putty: It is the most effective method to remove stubborn dirt. It works just like Blu-Tack or sticky clay: you insert it into the hole, remove it, and the dirt sticks out. You have to be careful not to leave residue inside.
Which No You must under no circumstances use: wooden chopsticks, needles, clips or any sharp metal object. They can scratch or displace the microphone membrane, which is extremely delicate. Also no liquids—not even isopropyl alcohol—applied directly to the hole.
The process, step by step
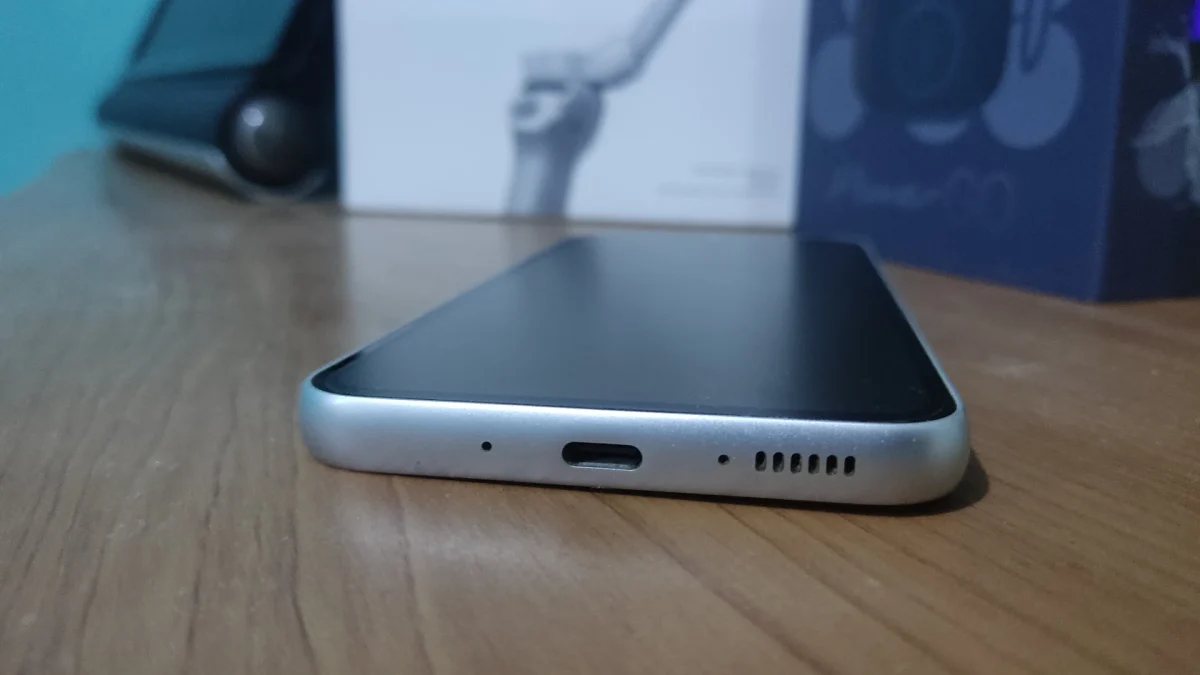
Find a well-lit place before you start. You're going to be working with a tiny hole and light matters.
- Turn off your cell phone. Always before any cleaning intervention.
- Start with compressed air. Place the can about 5cm from the microphone hole and apply short bursts. Don't stick it into the slot or use long, continuous bursts. The objective is for the surface dust particles to come out. Rotate the angle to cover all sides of the hole.
- Use the brush in gentle circular motions. Insert it without forcing and without reaching the bottom. The idea is that the dust stays on the bristles. Take out the brush periodically, clean it and go over again. If you put the brush full of powder back into the slot, you are doing the job in reverse.
- Apply cleaning putty if dirt persists. Shape it into a cylindrical shape, place it over the hole and press gently so that it fits a little. When you remove it, you should take the deepest remains with you. It is the most effective step, but the one that requires the most care: make sure that there are no fragments of putty left inside.
- Finish with two or three more bursts of compressed air to remove any loose debris.
How to know if it has worked
Turn on your phone and make a sound test. The easiest way is to open the voice recorder application – which comes pre-installed on practically every Android and iPhone -, record a few seconds speaking in a normal tone, and listen to the result. If the audio sounds clear and without distortion, mission accomplished.
A useful complementary test: record yourself with the phone's microphone and then with headphones that have an external microphone. If there is a significant difference in quality in favor of headphones, eThe internal microphone probably still has a problem.
You can also make a test call to someone you trust and ask him directly if he hears you well.
Check the cover well
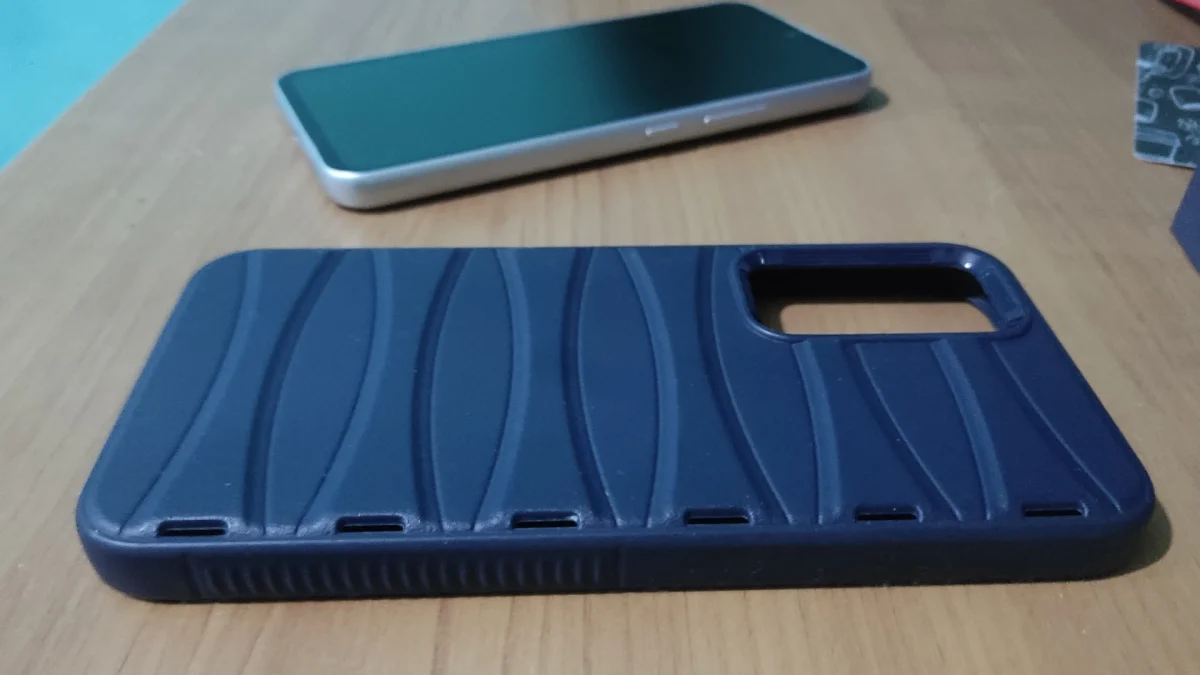
It's something that's often overlooked: many cases, especially poorly designed ones, partially cover the microphone holes or they displace them. If you notice that they hear you poorly, before even cleaning the microphone, remove the cover and see if the problem disappears. The solution may be to simply change the case or adjust the one you have.
If after cleaning it still doesn't work well
There are situations in which cleaning is not enough because the problem goes beyond dust. Some symptoms that point to internal damage are: the voice sounds very low even in quiet environments, there are constant clicking or distortion that does not vary depending on the application you use, the voice assistant does not recognize you well, orThe recorder app does not directly record any sound.
In these cases, the accumulated dirt may have acted as a corrosive agent on the internal contacts, or may have permanently displaced the microphone membrane. Repeating the cleaning process is not going to solve that..
Before going to the technician, there is a software setting that is worth checking: some Android phones have a noise cancellation or reduction option activated by default which, paradoxically, can make your voice sound muffled in certain circumstances. Look in Settings > Call settings > Noise reduction and temporarily turn it off to see if there is a change.
If none of this works, the most sensible thing to do is to go to a authorized technical service. A technician can disassemble the module, clean the contacts with ultrasound and, if necessary, replace the damaged microphone. It is not worth risking your device with more aggressive methods if you have already exhausted the basic options.
A habit worth adopting
Cleaning the mobile microphone should not be something that is only done when there is already a problem. Do it once a month as part of general phone maintenance—along with cleaning the screen or charging connector— extends component life and ensures that audio quality remains in optimal condition. A quick two-minute cleaning with compressed air and a brush is more than enough as a preventative routine.
And since we're talking about getting the most out of your mobile audio, if you have a Samsung it's worth knowing the Independent Application Sounda One UI feature that allows you to send audio from a specific app to the headphones while the rest of the sound continues to come out of the speaker. Once you discover it, you don't understand how you ever lived without it.